Getting started
Logging in
Navigate to your organisation’s Qpercom URL — this generally follows the format example.qpercom.com. Enter your Identifier or registered email address along with your password and click Log in. when more than one account is associated with a user’s email address, users will be shown all accounts available and can choose the appropriate one for this session. The account selection step can be bypassed if a user logs in with the unique username associated with their account.
Changing your password or account details
Click your initials in the top right of the screen or navigate to Main >>> Manage Account. Specify your current password, enter a new password twice, and click Save. You can also use the Forgot password option on the login screen to reset via email, provided your user role is authorised to do so.
Usage tracking
View usage tracking on the homepage to monitor submitted scoresheets, video minutes, SMS messages, composition minutes, and portfolio uploads.
Events calendar
View all upcoming assessment events on your Events calendar on the homepage. You can view by month or in list form and clicking on any event listed will take you directly to that event.
Organisation setup
Manage assessment periods
Navigate to Main >>> Manage Assessment Periods. Edit existing period names or date ranges, or click Add to create a new assessment period.
Manage organisation structure (fields and branches)
Navigate to Fields from the top menu to view existing fields and add new ones. Each field requires a unique identifier and name. Navigate to Fields >>> Branches to manage branches within each field — each branch also requires a unique identifier and name.
Manage competency frameworks
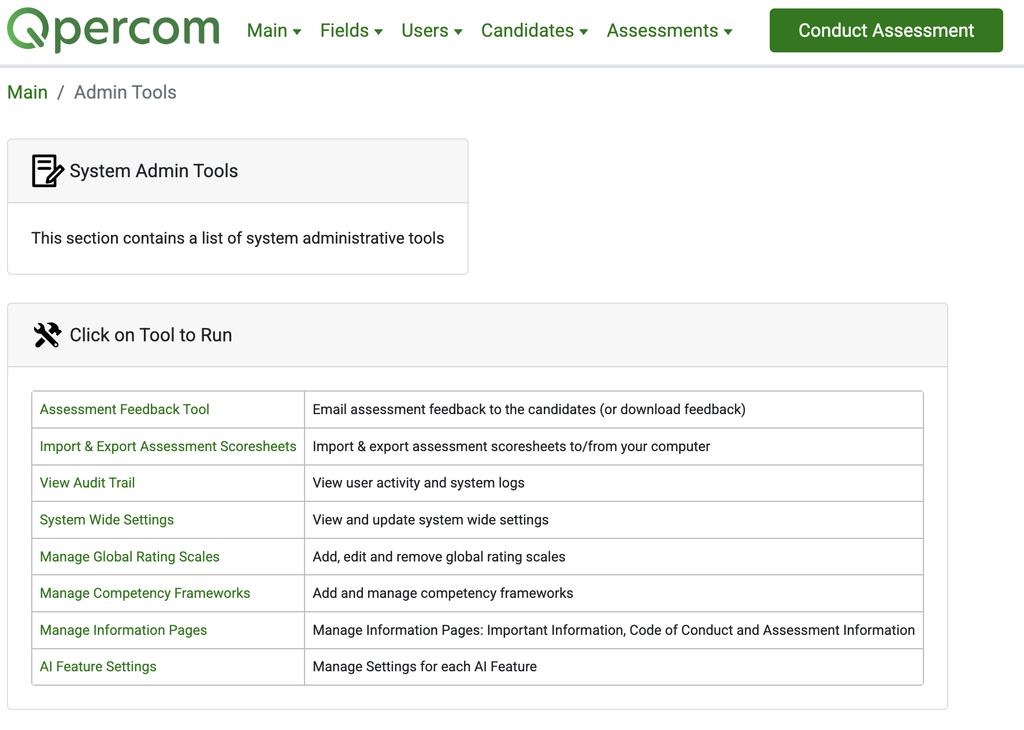
Navigate to Main >>> Admin Tools >>> Manage Competency Frameworks. Click Add Framework, give it a name and description, and save. Within each framework you can add competencies and sub-competencies and reorder them as required.
To make a competency framework available for blueprinting, navigate to Fields >>> Manage Branches and add the framework to the relevant branches. Once added, it will be available within scoresheet and question options.
Managing users
Administrators
Navigate to Users >>> Manage System Wide Users to view, add, and update administrator accounts. You can specify a user’s role as Administrator, Field Administrator or Support Agent which sets the privileges for what each user will have access to manage.
Assessment team
Navigate to Users >>> Manage Assessors/Assessment Team to manage team members. Use the search filters to find users quickly. Roles you can assign include Assessor, Assessment Administrator, Station Manager, Actor or Clinical Lead.
To import a large number of assessment team members in bulk, navigate to Users >>> Import Assessment Team, download the CSV template, populate it with user information, and follow the on-screen steps to import. User records will be created or updated on completion.
Candidates
Navigate to Candidates >>> Manage Candidates to filter, view, and update existing candidate records. Manage levels and cohorts via Candidates >>> Manage Candidate Levels and Cohorts.
To import candidates, choose either the Custom Group Name CSV template for small groups or the Levels and Cohorts CSV template for larger cohorts. Import candidate profile images via Candidates >>> Import Candidate Images — images uploaded as a ZIP file will link automatically to candidate records and display during assessments.
Authoring assessment content
Scoresheet bank
Navigate to Assessments >>> Scoresheet Bank to add, edit, delete, and preview scoresheets. When clicking Add, choose from three scoresheet types:
Assessment scoresheet
For general observational assessments such as OSCEs and MMIs. Add sections and scoring items using Numeric Likert Scale, Numeric Value Entry, Numeric Slider Scale, or Checkbox (Indicator Only) options. Items can be linked to competency domains as well as adding flags and pairing them with critical item rules.
MCQ scoresheet
For knowledge assessments including SBAs, EMQs, EAQs, SAQs, and VSAQs. Add pages and questions, choosing from Single Best Answer, Multiple Correct Answers, Extended Match, Ranking Extended Match, Very Short Answer, Short Answer, and Essay Answer question types.
Object scoresheet
For OSCE or MMI stations without assessors — suitable for data entry or written scenarios where candidates input answers on a computer or tablet under invigilator supervision.
Within any scoresheet, you can Clone existing sections or items to reuse scoring values and descriptors. You can also add instructions, media, content tags, and link competency frameworks via the scoresheet options page. Click Update for all changes to take effect.
Question bank
Navigate to Assessments >>> Question Bank to add, edit, delete, and preview individual questions for use in knowledge assessments. Search by keyword, scoresheet type, question type, competency framework, branch, period, or assessment event.
Options available per question include Duplicate, Manage, Preview, and View Performance. To view performance across multiple questions at once, select them and choose Questions Performance from the dropdown.
AI-assisted question import
AI-assisted import functionality is available for bulk importing knowledge questions into the Question Bank. This reduces manual data entry time when migrating large question sets.
Managing assessments
Creating an assessment event
Navigate to Assessments >>> Management & Analysis and click Add. Specify a name and description and configure the following key settings:
- Type: OSCE, Interview, Self Assessment, or Knowledge Assessment
- Location: choose from non-remote event, hybrid non-remote event or remote or controlled assessment event
- Default Assessors: the number of assessor slots per station
- Grade: choose from preset grade rules
- View Assessment Results: enable to allow assessors to view results they submit across their day
- View Item Marks: enable to allow assessors to view item marks
- View Overall Totals: enable to allow assessors to view scoresheet overall totals
- Use Submit & Next: enable to allow assessors to from to the next candidate scoresheet without returning to the candidate list
- Display Code of Conduct: enable to present information and consent pages to candidates
- Is Automated Proctoring: enable to support administrators with integrity scores and proctoring reports
- Is Live Proctoring: enable to support administrators with CCTV style overview of all circuit activity
- Second Camera Proctoring: enable to present candidates with a QR code for activating a second camera device
- Candidate Safe Exam Browser: enable to require candidates to access the assessment in kiosk mode via Safe Exam Browser
- Show Countdown: displays a guide countdown timer to assessors during non remote assessments
- Is Accessible: set to Yes to allow participants to access the assessment
Day/Circuit and group setup
You can add as many Day/Circuits to an assessment event as you require. When setting up a remote assessment circuit, ensure the number of stations is balanced with the number of candidates in each group. You have two options for balancing:
- If you have more candidates than stations, add Rest Stations at appropriate positions on the circuit
- If you have more stations than candidates, add BLANK candidates to groups to balance the numbers
For assessments with multiple day/circuits, only the day/circuits being actively run need to be set to Accessible: Yes.
Manage Stations
Navigate to Manage Stations within your circuit. Here you can create as many stations and order them as you require for each assessment event. You can add different station types depending on the assessment event and options to choose from include Assessor, Group, Evidence Verification, Object, Rest or Self Recording. Settings are available for asynchronous station types where you can set an open and close date, some instructions and for evidence verification you can set if Open Appeals should be enabled and what the window to access appeals should be.
Scheduling Groups
Navigate to Manage Groups within your circuit. Here you can create as many groups as you require with a unique name for each and optional settings for access code, reasonable adjustment %s for both the reading time and assessment states. Clicking on Add Candidates will open a side pane with all candidate lists available on Qpercom and you can drag and drop one by one from the list selected. To bulk add candidates from the list, specify within your group how many candidates you want to move into a group and they will be added in bulk. Blank candidates can also be dragged into any group when required.
Adding media
Click the Upload icon, navigate to Media Centre from the main menu, or click Media Management within any scoresheet. Organise media within clearly labelled folders to make it easy to attach the correct file to each scenario.
Media can be linked in one of two ways:
- Attach to Station — available within that station for one assessment event only
- Attach to Scoresheet — available in all assessment events using that scoresheet
To make media shareable (i.e. available for the assessor to share with candidates on demand during a station), tick the Shareable checkbox when attaching.
Conduct assessment (updating scoresheets on behalf of an assessor)
Navigate to Conduct Assessment on the top menu. Select the Assessment Period, Branch, Assessment, Session, and Group. Choose the assessor name from the Assess as dropdown and select the submitted scoresheet to update marks or feedback comments.
Running a live assessment
Starting a session
- Click Monitor Assessment Sessions and select Configuration to set timings, state names, and participant name visibility options.
- From the session list, select the session you want to control.
- The Monitor, Circuit Prompts, Candidate List, and Active Rooms tabs will load for the chosen session.
- Use the State bar at the top to track the current group and state. Use the Change to next state control to progress participants through the circuit.
- A clock is available on the left panel at all times. Use Reset Session if the session needs to be started over.
Monitor tab — scoresheet progress
The Monitor tab gives an overview of all station activity. Progress bars update in real time — check this at every checkpoint state to confirm scores are being submitted. Scoresheet states are colour coded:
Circuit tab — candidate overview
Each group and all candidates within are listed showing which station each candidate is in during each rotation. Click any candidate for more detail on assessors and candidate information. Toggle candidate IDs and names on or off using the Display checkboxes on the left panel. A green arrow in the Rotation column marks the current active rotation.
Circuit prompts
Use the Circuit Prompts tab to send messages to participants during a session. Create custom prompts, specify which participant roles receive them, and set prompts to send automatically at specified intervals within states.
Active rooms and recording
The Active Rooms tab shows all live video rooms. Click Record on any room to begin recording — a red recording icon will appear on that room’s tile. Click Stop Recording when appropriate. All recordings are stored in the Media Centre for post-event download and review. If second camera proctoring is enabled and recording is active, both camera feeds will be recorded.
Automated Proctoring
During live assessments, the platform now monitors candidate activity and surfaces alerts to administrators when behaviour patterns warrant review as part of Qpercom’s layered invigilation approach. Alerts appear within the candidate list.
Post-assessment: results and analysis
Accessing results
The results and analysis page becomes available as soon as an assessment event begins. The histogram icon will appear on the assessment list as soon as the first assessor starts entering scores. Click it to open the results page.
Standard setting — Angoff method
Prior to running advanced analysis, your assessment team may use the Angoff method to set expected pass marks. Enter cut score values per station on the Manage Stations page or on the Rules tab after the event has begun. Qpercom supports decimal precision of up to 3 decimal places for cut scores.
Advanced analysis — borderline regression
Click Advanced Analysis, enter an analysis name, and choose one of four borderline regression methods:
- Borderline group method — average of only those marked as Borderline
- Borderline regression method 1 — incorporates all marks assuming GRS values of 0=Fail, 1=Borderline, 2=Pass, 3=Good, 4=Excellent. Pair with a Fail / Borderline / Pass global rating scale.
- Borderline regression method 2 — uses the midpoint between Borderline Fail and Borderline Pass. Pair with a Fail / Borderline Fail / Borderline Pass / Pass global rating scale.
- Contrasting groups method — cut score is the median between the average of those who passed and those who failed
Cronbach’s Alpha and Standard Error of Measurement (SEM)
Include Cronbach’s Alpha values for your stations and choose an SEM option:
- SEM 1 — 68% confidence interval = SD × √(1 − Alpha)
- SEM 2 — 95% confidence interval = SD × √(1 − Alpha) × 1.96
The lower bound of the chosen SEM is used as an adjustment of the initial score or percentage.
Exam rules
Adjust the following five exam rules within your advanced analysis setup as appropriate:
- Calculate everything in: Percentages or Actual Scores
- Minimum number of stations to pass: disabled or a specified number
- Decimal precision: None, 1, 2, or 3 decimal places
- Multi-examiner scores per station: Aggregated or Averaged
- Overall cut score: default is the average of current station cut scores
Click Calculate — the system will fetch your analysis via R and return adjusted cut scores per station.
Generalisability theory analysis
Generalisability Theory (G-Theory), among other analysis reports, is now available as an advanced analysis option alongside the existing borderline regression methods. It provides a more comprehensive decomposition of score variance across candidates, assessors, and stations, supporting robust assessment board decisions. The comprehensive tab is where you will find Qpercom’s AI-supported analysis reporting companion where you can choose from pre-populated options including Generalisability Theory analysis or use the query box to input a specific analysis query for your dataset.
Exporting results
After completing the checklist and clicking Confirm & Publish, select the sheets you want to include and click Export to File to download results in MS Excel format. Raw results per station are available for immediate export. Note that data will export in the same order you have sorted it on screen, so sort before exporting if a specific order is required.
Deleting results
If you have sufficient administrator privileges, you can delete all results for an assessment:
- 1Click the histogram icon for the assessment.
- 2Check the Unlock Delete checkbox.
- 3Click Delete, complete the confirmation prompts, enter your password, and click Delete again.
Candidate feedback
Generating and publishing feedback
Navigate to Assessments >>> Send Feedback. Choose an email template, select the assessment, and configure which feedback elements to include. Click Generate Feedback to produce personalised PDF reports for each selected candidate.
Preview any PDF to check the content, then either:
- Click Download Feedback (.ZIP) to save all reports to your device in bulk
- Click Publish to Candidate Portfolio to push reports to candidates’ Qpercom dashboards and email them directly
Feedback can also be downloaded for use in one-to-one discussions where you do not want candidates to retain a copy.
AI-assisted actionable feedback
AI-supported actionable feedback is available to structure candidate feedback by combining scores, global ratings, assessor feedback comments and scoresheet instructions into coherent, actionable feedback reports which you can share directly with candidates.Choose from 5 models of AI-assisted feedback: Rule of 3, Boost, Feedme, AID and Calgary-Cambridge modified.
Viewing scoresheets as PDFs
Navigate to Manage Stations within your assessment and click Get Print Marking Sheets at the top of the screen. Select individual or all station scoresheets and click Generate PDF to download. Use this to print a small number of backup scoresheets in case of a network outage.
Appeals management
Candidates can now lodge appeals directly from their Qpercom dashboard, streamlining the process for both candidates and assessment teams. Administrators can export appeals reports, search, and use status filtering steps to view, manage, and respond to candidate appeals on Qpercom.
Audit trail
Navigating to the audit trail
- Click Main >>> Admin Tools from the top menu.
- Click View Audit Trail.
Searching the audit trail
The audit trail is most commonly used to check whether a candidate has requested a bypass or made it into their waiting area. Set the following filters before clicking Fetch Logs:
- Date Range — the more precise your window, the faster results will load. For a bypass check, set this to 30 minutes in the past to the present.
- Search keyword / user ID — enter the candidate’s user ID (UID).
- Results per page — default is 20. Increase if you need more entries returned.
- Categories — select both User and Application. Note that only User is selected by default — ensure Application is also checked.