This should be used if pronation and supination and/or flexion or extension of the elbow needs to be prevented, for example in the case of ulnar and radial fractures.
Material
Lay out all the required materials:
- Stockinette; select the appropriate size.
- Synthetic wadding.
- Plaster of Paris rolls; select the correct width; it should be wide enough to form half a cylinder. Remove the plaster of Paris rolls from the packaging.
- Absorbent bandage, to fix the plaster.
- Crepe roller bandage or cambric roller bandage to finish off, if necessary.
- Bandage scissors.
- Bandage hook fasteners or adhesive plasters.
- Sling or collar’n’cuff.
Procedure
- Fill a small bucket with lukewarm water (around 20° C) and place this as close to the treatment table as possible.
- Ask the patient to sit at the treatment table with the arm in the position in which it is to be immobilised.
- The elbow should be at a 90° angle, and the wrist should be in slight dorsal flexion, in a neutral position between pronation and supination.
- Determine the required length of stockinette (1.5 x the length of the actual plaster bandage) [Figure 112].
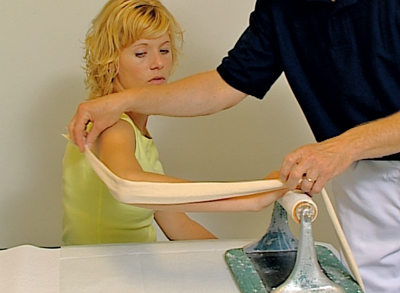 Figure 112
- Slide the stockinette over the arm; make a cut for the thumb.
- Place a layer of padding all around, and an additional layer on pressure-sensitive points.
- Cut a hole for the thumb.
- Partially unroll the plaster bandage and measure the length of the splint by holding it along the bent arm.
- Fold the unrolled plaster bandage into 5 to 6 layers.
- If using pure plaster of Paris, 10 to 12 layers will be necessary.
- Cut the plaster bandage away a little at the site of the elbow and cut out a triangle for the thumb [Figure 113].
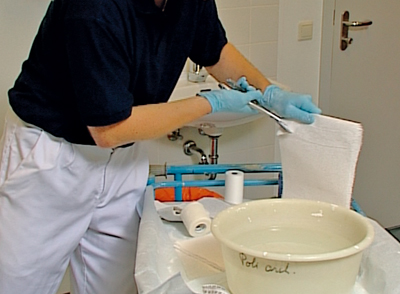 Figure 113
- Fold the layers of plaster bandage and briefly submerge the bandage in the water.
- If the plaster bandage is held at an angle, a few seconds will suffice [Figure 114].
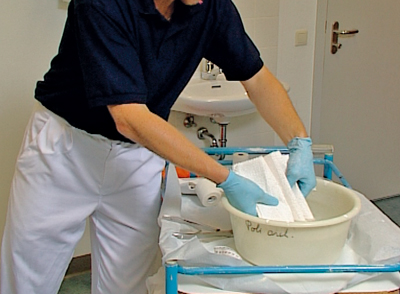 Figure 114
- Remove the plaster bandage from the water and gently squeeze out any excess water [Figure 115].
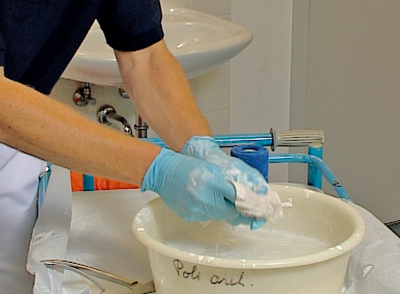 Figure 115
- Stretch out the splint and place it along the back of the arm.
- The metacarpal joints should remain uncovered.
- Mould the plaster, making sure that the elbow remains at a 90° angle, the wrist in about 15° dorsal flexion and the forearm in a neutral rotation [Figure 116].
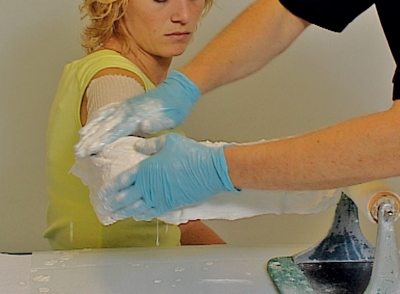 Figure 116
- Avoid making indentations with your fingers (be mindful of the risk of pressure necrosis).
- Apply a wet absorbent roller bandage circularly around the newly moulded plaster.
- Make sure that the correct joint position is maintained throughout, until the plaster has hardened.
- Inform the patient that heat will be given off during the hardening process.
- To finish off, a chambray or crepe bandage can be applied (if required) [Figure 117].
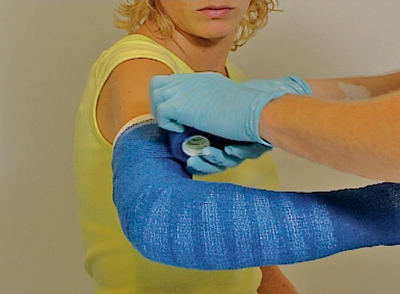 Figure 117
- Once the plaster cast has hardened, apply a sling or collar’n’cuff.
- Tell the patient that it will be at least another 24 hours before the plaster is hard enough to take a knock.
- Ask the patient to inform you immediately if the fingers on the immobilised arm turn blue or pale.
- Instruct the patient to regularly move their fingers.


